
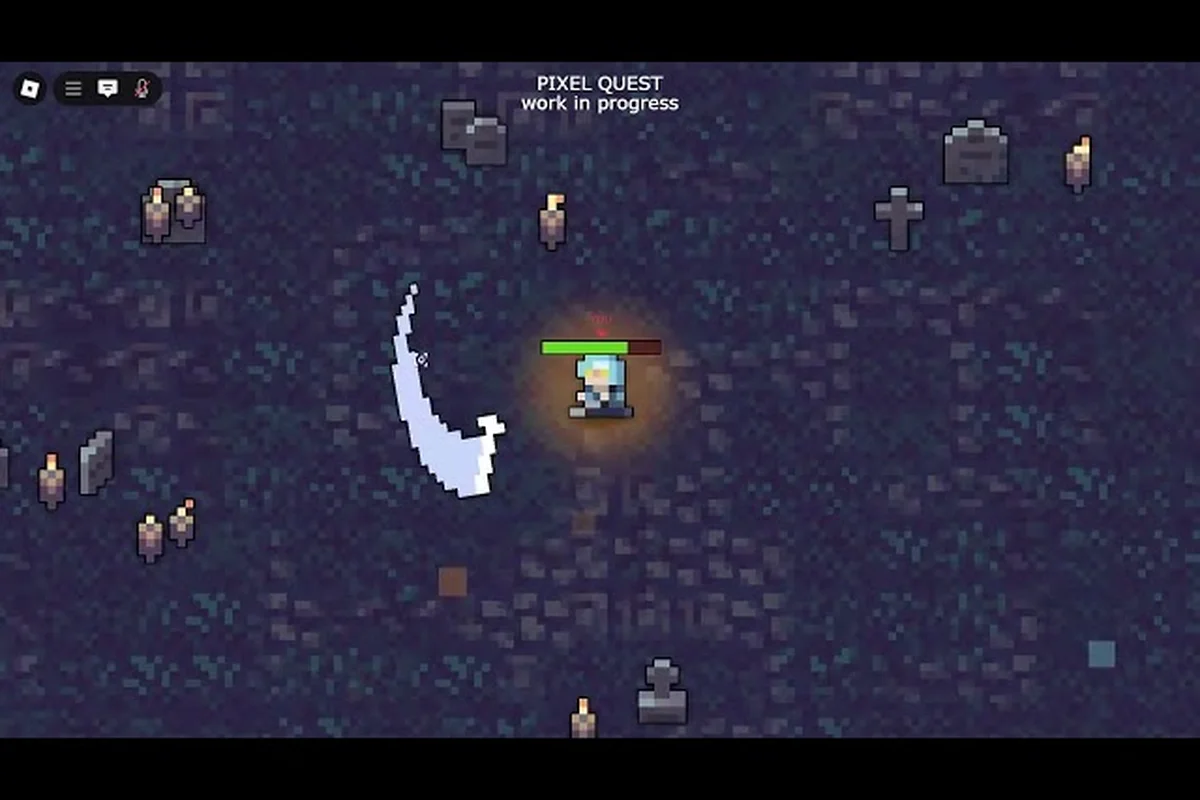
The Pixel Quest swordsman guide you are about to read covers everything from stat allocation to weapon choices, because the melee playstyle demands a completely different approach than ranged classes in this bullet-hell roguelike. While mages and archers can kite enemies from a safe distance, the swordsman thrives in close quarters where every dodge matters and positioning decides whether you survive the next room. This guide breaks down the best melee build for beginners, explains how to allocate stats across your first few runs, and shows you how to transition into advanced playstyles like the berserker build once you understand the fundamentals.
Swordsman Class Overview and Core Strengths
| Weapon Type | Base Damage | Attack Range | Attack Speed | Best For |
|---|---|---|---|---|
| Sword | 25–40 | 1.5 tiles | 0.8s | Melee DPS, close-range burst |
| Axe | 35–55 | 1.2 tiles | 1.2s | High single-hit damage, tank busting |
| Dagger | 15–22 | 1.0 tile | 0.4s | Fast crit stacking, mobility builds |
| Bow | 20–30 | 6.0 tiles | 0.9s | Ranged kiting, safe poke |
| Staff | 28–45 | 4.5 tiles | 1.1s | AoE magic damage, crowd control |
The swordsman is the most forgiving melee class in Pixel Quest because it combines solid health scaling with straightforward damage output, making it the ideal starting point for players who want to learn boss patterns without getting deleted in one hit. According to the official Pixel Quest page on Roblox, the game features bullet-hell combat with 80+ bosses and 30+ dungeons, which means you will face dense projectile patterns that punish careless positioning. The swordsman's base HP multiplier of 1.25x gives you a meaningful buffer compared to the mage's 0.85x, and that extra survivability translates directly into more learning opportunities during your first dungeon runs.
What makes the swordsman particularly strong in the current meta is the Parry Window mechanic, a 0.4-second timing window that activates when you block just before an attack lands. Successfully parrying reduces incoming damage by 90% and grants a brief 2-second damage buff that increases your next attack by 35%. This mechanic rewards aggressive play because you can parry a boss projectile, then immediately close the distance and punish with a charged slash. Community reports from the Pixel Quest Discord suggest that players who master the parry window can clear dungeons up to 30% faster than those who rely purely on dodging.
The class also benefits from a passive armor rating of 15 that reduces all incoming damage by a flat amount, which stacks with gear bonuses. While this might not sound impressive on paper, it becomes significant when you consider that most early-game projectiles deal between 8 and 25 damage. The flat reduction means you effectively ignore the weakest enemy attacks entirely, letting you focus on dodging the telegraphed heavy hits that actually threaten your health pool.
Starting Stats and Growth Rates
Your starting stat allocation determines how your swordsman scales through the first 20 levels, and getting this right matters more than any single piece of gear you will find. The swordsman begins with 12 Strength, 10 Vitality, 8 Agility, and 5 Intelligence, which already positions you for a melee build that prioritizes raw damage and survivability over utility. Each level-up grants you 3 stat points to distribute freely, and the growth rates for each stat follow a predictable pattern that rewards focused investment.
| Stat | Starting Value | Growth per Point | Recommended Priority |
|---|---|---|---|
| Strength | 12 | +2.5 melee damage | Highest for damage builds |
| Vitality | 10 | +12 HP per point | High for survivability |
| Agility | 8 | +0.8% dodge chance | Medium for mobility |
| Intelligence | 5 | +1.5% ability damage | Low for pure melee |
The table above shows why most experienced players recommend a 2:1 Strength-to-Vitality ratio during your first 30 levels. This allocation gives you enough damage to clear trash mobs efficiently while maintaining a health pool that can survive a few mistakes during boss encounters. Players who dump everything into Strength often find themselves dying to a single unlucky hit in the second dungeon, while those who over-invest in Vitality struggle to kill enemies before their mana runs out.
Weapon Types and Playstyle Variations
The swordsman class can equip three weapon categories, and each one changes your effective playstyle in meaningful ways. Straight swords offer balanced damage and attack speed, making them the safest choice for learning boss patterns. Greatswords trade attack speed for significantly higher per-hit damage, which works well when you have mastered the parry window and can afford longer recovery frames. Dual blades sacrifice raw damage for attack speed and mobility, letting you weave in and out of danger while applying consistent pressure.
Weapon choice also affects your special ability meter, which fills faster when you land consecutive hits without taking damage. Straight swords fill the meter at a rate of 8% per hit, greatswords at 12% per hit, and dual blades at 5% per hit but with a much faster attack rate. This means greatsword users can activate their Whirlwind Slash ability more frequently, while dual blade players need to maintain longer combos to access their Blade Dance ultimate.
Stat Allocation Strategy for Melee Builds
Understanding how to distribute your stat points is the difference between a swordsman who clears dungeons comfortably and one who struggles against the second boss. The core principle is that Strength scales your base damage linearly, while Vitality provides diminishing returns after 40 points because enemy damage also scales with dungeon difficulty. Most endgame melee builds settle on a final stat spread of roughly 60 Strength, 35 Vitality, 20 Agility, and 5 Intelligence by level 50, which balances damage output with enough survivability to survive two or three hits from endgame bosses.
For your first few runs, however, you should focus on reaching specific breakpoints rather than following a rigid formula. The first breakpoint is 20 Strength, which unlocks the Heavy Slash ability that deals 150% weapon damage and has a short cooldown. The second breakpoint is 30 Vitality, which pushes your health pool above 300 HP and lets you survive a full combo from most mid-game bosses. After reaching both breakpoints, you can start investing in Agility to improve your dodge chance, which becomes increasingly valuable as enemy projectile density increases.
Early Game Allocation (Levels 1-20)
During the first 20 levels, your priority is reaching the Strength breakpoints that unlock your core abilities while maintaining enough health to survive mistakes. A common allocation pattern is 2 Strength, 1 Vitality per level, which gives you 40 Strength and 20 Vitality by level 20. This spread lets you unlock Heavy Slash early while keeping your health pool above 200 HP, which is sufficient for the first two dungeons.
Players who want to experiment with the berserker build should consider a more aggressive allocation of 3 Strength, 0 Vitality per level during this phase. The berserker archetype relies on the Berserk passive, which increases your damage by 1% for every 1% of missing health, meaning you want to maximize your damage ceiling even if it means playing riskier. This build works best when paired with lifesteal gear, which we will cover in the equipment section below.
Mid Game Allocation (Levels 21-40)
Once you reach level 21, enemy damage starts scaling noticeably faster, and you need to adjust your stat allocation accordingly. The recommended approach is to shift to a 1 Strength, 2 Vitality ratio during these levels, which brings your health pool up to around 400 HP by level 40. This investment pays off because the third dungeon introduces enemies that deal 15-20 damage per projectile, and you need the extra buffer to survive the boss fight.
The mid-game is also when you should start investing in Agility, particularly if you are using dual blades or straight swords. Each point of Agility grants 0.8% dodge chance, and reaching 20 Agility gives you a 16% chance to completely avoid incoming damage. While this might seem low, it stacks multiplicatively with your base dodge chance and becomes more valuable as you face denser bullet patterns in later dungeons.
Late Game Optimization (Levels 41+)
At level 41 and beyond, you should have a clear picture of your preferred playstyle and can optimize your stats accordingly. The standard melee build finishes with 60 Strength, 35 Vitality, and 20 Agility, while the berserker build pushes Strength to 70 and keeps Vitality at 25. Players who want to transition into a hybrid playstyle can check the class stats guide for a detailed breakdown of how different stat distributions affect each class.
The late game is also when you should consider how your stat allocation interacts with your equipment bonuses. Legendary gear often provides percentage-based stat bonuses, which means your raw stat points become more valuable as your gear improves. For example, a +15% Strength bonus from a legendary chest piece adds 9 Strength when your base is 60, which translates to roughly 22 additional melee damage per hit.
Best Melee Builds and Equipment Loadouts
Choosing the right build for your swordsman depends on whether you are playing solo or with a group, as well as which dungeon tier you are currently farming. The standard melee build focuses on consistent damage and survivability, making it the safest choice for progressing through the main story. The berserker build trades safety for significantly higher damage output, which shines in speed runs and boss farming but requires precise play to avoid dying.
| Build Type | Strength | Vitality | Agility | Best Weapon | Playstyle |
|---|---|---|---|---|---|
| Standard Melee | 60 | 35 | 20 | Straight Sword | Balanced offense and defense |
| Berserker | 70 | 25 | 20 | Greatsword | High risk, high reward damage |
| Assassin Hybrid | 45 | 25 | 45 | Dual Blades | Mobility and crit-focused |
The table above compares the three most popular swordsman builds, and each one requires different equipment priorities. The standard melee build benefits most from armor with flat damage reduction and health bonuses, while the berserker build needs lifesteal and damage percentage increases to stay alive at low health. The assassin hybrid build, which shares some DNA with the dagger build strategies covered in our weapons guide, prioritizes critical strike chance and attack speed over raw damage.
Standard Melee Build Equipment
For the standard melee build, your equipment priorities are health, armor, and flat damage reduction in that order. The Knight's Chestplate provides +80 HP and +10 armor, making it the best early-game chest piece for this build. The Guardian Helm adds another +50 HP and reduces all incoming damage by 5%, which stacks with your class passive for meaningful damage mitigation.
Weapon choice for the standard build should favor straight swords with bonus damage against bosses or increased parry window duration. The Royal Longsword is a popular choice because it deals 25% bonus damage to bosses and has a slightly longer parry window than other swords in its tier. For your off-hand, a Tower Shield provides +15 armor and a 10% chance to block projectiles completely, which complements your defensive playstyle.
Berserker Build Equipment
The berserker build requires a completely different equipment philosophy because you are intentionally keeping your health low to maximize damage. The Vampiric Blade is essential for this build because it converts 8% of your damage into healing, letting you sustain through fights even at low health. The Berserker's Pauldrons increase your damage by 2% for every 5% of missing health, which stacks multiplicatively with your class passive.
For this build, you want to prioritize damage percentage increases and lifesteal over flat health and armor. The Bloodthirsty Amulet provides +12% damage and +4% lifesteal, while the Warlord's Boots grant +10% movement speed, helping you close distance faster and dodge projectiles more effectively. This build excels in boss fights where you can maintain high damage output while healing through the damage you take.
Combat Techniques and Positioning Tips
Mastering melee combat in Pixel Quest requires a different mindset than playing ranged classes, because you need to be constantly aware of your positioning relative to both enemies and their projectile patterns. The most important technique is hit-and-run trading, where you dash in, land one or two attacks, and dash back out before the enemy can retaliate. This approach works because most enemies have a wind-up animation before their attacks, giving you a brief window to punish them safely.
Another essential technique is corner trapping, which involves positioning yourself so that enemies are forced to approach you through a narrow corridor. This limits their movement options and makes their projectile patterns easier to dodge, since you only need to track attacks coming from one direction. Corner trapping is particularly effective against melee enemies that try to close distance, because you can attack them as they approach while keeping yourself safe from ranged threats behind them.
Dodging and Parrying Fundamentals
The dodge roll in Pixel Quest grants 0.5 seconds of invincibility frames, which is enough to pass through most projectile patterns if you time it correctly. The key is to dodge toward the projectiles rather than away from them, since this lets you close distance while avoiding damage. Many beginners make the mistake of dodging backward, which often puts them into more danger as they retreat into areas they have not cleared yet.
Parrying is riskier but more rewarding, since a successful parry reduces damage by 90% and grants a damage buff. The parry window is 0.4 seconds, which means you need to press the block button just before the attack lands. Practice parrying on the first dungeon's boss, which has a predictable three-hit combo that is ideal for learning the timing. Once you master the parry window, you can use it to negate some of the most dangerous attacks in the game.
Positioning Against Boss Patterns
Each boss in Pixel Quest has unique attack patterns that require different positioning strategies. The Crystal Titan in the mid-game uses a radial burst of projectiles that is easiest to dodge by staying close to its body, since the projectiles spread outward and create gaps near the center. The Toxic Slime boss, by contrast, creates pools of poison on the ground that force you to keep moving, making it harder to maintain sustained damage output.
For the Viper Queen in the Serpent Catacombs, you want to stay at mid-range and bait her lunge attack, then punish her during the recovery frames. This fight tests your ability to read telegraphed moves and position yourself to avoid the poison spray that follows her lunge. Players who master these positioning fundamentals will find that the S-tier weapon rankings become more relevant, since better weapons amplify the advantages created by superior positioning.
Advanced Swordsman Strategies for Endgame Content
Once you have mastered the fundamentals, you can start exploring advanced strategies that push the swordsman class to its limits. The parry-cancel technique lets you cancel the recovery frames of your heavy attacks by parrying, which effectively increases your attack speed while maintaining the damage output of slower weapons. This technique requires precise timing and is difficult to execute consistently, but it significantly increases your damage per second when performed correctly.
Another advanced strategy is aggro management, which involves positioning yourself to control which enemies are targeting you in group fights. By staying at the edge of enemy aggro ranges, you can pull individual enemies away from groups and deal with them one at a time. This approach is essential for clearing the later dungeons, where fighting multiple enemies simultaneously often leads to unavoidable damage.
Transitioning to the Berserker Build
The berserker build is the most popular endgame swordsman playstyle because it offers the highest damage output in the game, but it requires a deep understanding of the game's mechanics to play effectively. The key is learning to ride the danger zone, keeping your health between 20% and 40% to maximize your damage bonus while still having enough buffer to survive a single hit. This playstyle is not recommended for beginners, but players who master it can clear dungeons significantly faster than any other class.
To transition into the berserker build, start by gradually shifting your stat allocation toward Strength and acquiring lifesteal gear. The Vampiric Blade is the most important piece of equipment for this build, since it lets you sustain through fights even at low health. You should also practice playing at lower health levels in easier dungeons before attempting endgame content, since the risk of dying increases substantially when your health pool is smaller.
Speed Running and Boss Farming
The swordsman class excels at speed running because its high damage output and survivability let you clear rooms quickly without needing to stop and heal constantly. The optimal speed run route focuses on skipping optional rooms and heading directly to the boss, using your damage output to melt through any enemies that block your path. The berserker build is particularly strong for speed runs because its damage bonus at low health lets you kill bosses in fewer rotations.
For boss farming, the swordsman's parry mechanic is invaluable because it lets you negate the most dangerous attacks while maintaining damage output. The best farming strategy is to learn each boss's attack patterns thoroughly, then use parries to create damage windows that let you kill the boss in two or three rotations. This approach is more efficient than simply dodging and waiting for openings, since parries both negate damage and increase your damage output.
Frequently Asked Questions
What is the best stat allocation for a beginner swordsman?
For your first 20 levels, allocate 2 points into Strength and 1 point into Vitality per level. This gives you enough damage to clear content efficiently while maintaining a health pool that can survive mistakes. After level 20, shift to a 1:2 Strength-to-Vitality ratio to prepare for harder dungeons.
How does the parry window work in Pixel Quest?
The parry window is a 0.4-second timing window that activates when you block just before an attack lands. A successful parry reduces incoming damage by 90% and grants a 2-second damage buff that increases your next attack by 35%. Practice on the first dungeon boss to learn the timing.
Is the berserker build better than the standard melee build?
The berserker build deals significantly more damage but requires precise play and lifesteal gear to stay alive at low health. The standard melee build is safer and more forgiving, making it better for progression and learning boss patterns. Choose berserker only after mastering the fundamentals.
What weapon should I use for the swordsman class?
Straight swords are the best choice for beginners because they offer balanced damage and attack speed. Greatswords deal more damage per hit but have slower attack speed, while dual blades prioritize mobility and critical strikes. Your choice should match your preferred playstyle and stat allocation.
Can the swordsman class work in co-op play?
Yes, the swordsman is an excellent co-op class because its survivability lets you draw enemy aggro while ranged classes deal damage from safety. Coordinate with your team to ensure you are not overlapping with other melee players, and use your parry to protect teammates from dangerous attacks.